In this post I will talk about managing workspace access for certain users in Linux environments. We will set a workspace where some guests will be able to work in their amazing project. These users won’t have access to the files outside of their shared workspace. Finally we will use Linux ACL to manage user permissions inside their workspace.
This post resolves a real issue that I had few days ago. I was asked to restrict access to a couple users in a server. At the time I had no idea how to solve this issue in a smart way.
Problem overview
I need to allow a new user who is developing a new website into our development environment machine.
Doing this is very easy, we only need to create a user in our server… but here comes the problem, this user would be able to see other users’ home folders, config folders, etc.
ssh developerguest1@IP_ADDRES_OF_OUR_TEST_MACHINE
$ cd /home/john/
$ ls
john_files
$ rsync -aP john_files SOMEWHERE
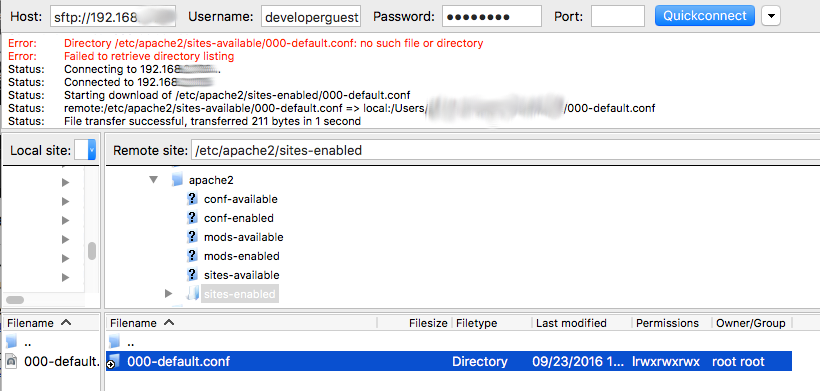
$ cd /etc/apache2/sites-enabled/
I don’t trust neither developerguest1 nor his brother in arms developerguest2. I want to isolate their workspace from my entire server. Both developers will be able to work in their work directories but they won’t be able to know what is outside those directories. In this real case both developers will share their workspace but some folders will be owned only by one of them.
Let’s do it!
Setting up our workspace
In this post we will use Vagrant to deploy our test server, it allows us to deploy development environments in minutes. We can deploy our environments to multiple providers such as VirtualBox, VMware Fusion or AWS. See the Official documentation for more info. In my case, I use Vagrant to make quick tests with Virtual Machines before deploying my configurations into production environments. Of course, you can use any other type of virtual machine or physical machines, as you wish.
Let’s start cloning my Sysadmin Scripts repo which contains the Vagrantfile that we will use.
git clone https://github.com/a-castellano/Sysadmin-Scripts.git
cd Sysadmin-Scripts/Vagrant/Ubuntu_14
cp bootstrap.sh.example bootstrap.sh
vim bootstrap.sh
Add your ssh public key in your local copy.
#!/usr/bin/env bash

#Make a copy of this file called bootstrap-ansible.sh
#Set your ssh key, it would be your master_key.pub
mkdir -p /root/.ssh
echo "YOUR PUBLIC SSH KEY" >> /root/.ssh/authorized_keys
apt-get update -y
apt-get upgrade -y
Let’s awaken our machine.
⇒  vagrant up
Bringing machine 'ubuntu1' up with 'virtualbox' provider...
==> ubuntu1: Importing base box 'ubuntu/trusty64'...
==> ubuntu1: Matching MAC address for NAT networking...
==> ubuntu1: Checking if box 'ubuntu/trusty64' is up to date...
==> ubuntu1: Setting the name of the VM: Ubuntu_14_ubuntu1_1474577586167_25708
==> ubuntu1: Clearing any previously set forwarded ports...
==> ubuntu1: Clearing any previously set network interfaces...
==> ubuntu1: Available bridged network interfaces:
1) en3: Ethernet Thunderbolt
2) en0: Wi-Fi (AirPort)
3) en1: Thunderbolt 1
4) en2: Thunderbolt 2
5) bridge0
6) bridge100
==> ubuntu1: When choosing an interface, it is usually the one that is
==> ubuntu1: being used to connect to the internet.
    ubuntu1: Which interface should the network bridge to? 1
When Vagrant ends it will show us our new machine IP address, let’s write it in our inventory file.
cd ~/Sysadmin-Scripts/Ansible
vim inventory/my.hosts
Place your Vagrant IP address in your inventory file.
[testMine]
192.168.*.*
Now, let’s create the playbook to setup our environment.
mkdir playbooks/setup_test
vim mkdir playbooks/setup_test/setup.yml
---

  - hosts: testMine

    vars_files:
      - ../../vars/target_hosts/testMine.yml

    roles:
      - { role: ../../roles/common_setup }
      - { role: ../../roles/zsh_setup }
      - { role: ../../roles/apache_setup }
      - { role: ../../roles/php_setup }
      - { role: ../../roles/create_user }
...
Our playbook needs another file containing the config of our test machine.
vim vars/target_hosts/testMine.yml
---
  server_hostname: Test

  usergroups:
    - developers

  users:
    - username: john
      groups: ['users']
      home: /home/john
      password: $1$SomeSalt$/jbIwfYCu0MxPBND2EtRH. #password


    - username: cassandra
      groups: ['users']
      home: /home/cassandra
      password: $1$SomeSalt$/jbIwfYCu0MxPBND2EtRH. #password


    - username: developerguest1
      group: users
      groups: ['developers']
      home: /var/www/developers
      password: $1$SomeSalt$/jbIwfYCu0MxPBND2EtRH. #password
      shell: /bin/false

    - username: developerguest2
      group: users
      groups: ['developers']
      home: /var/www/developers
      password: $1$SomeSalt$/jbIwfYCu0MxPBND2EtRH. #password
      shell: /bin/false
So, Ansible will create four users: two common users called John and Cassandra and two developers which won’t be able to log into our server using ssh. The password for all users is “password”.
Let’s configure our server:
ansible-playbook playbooks/setup_test_mine/setup.yml
After deploying our configurations let’s enter inside our vagrant machine.
cd Sysadmin-Scripts/Vagrant/Ubuntu_14
vagrant ssh
We will start copying our testing websites in our test machine. The script configure.sh also changes the apache2 conf allowing access on /var/developers.
sudo su
cd
git clone https://github.com/a-castellano/acl-post-websites.git
cd acl-post-websites
./configure.sh
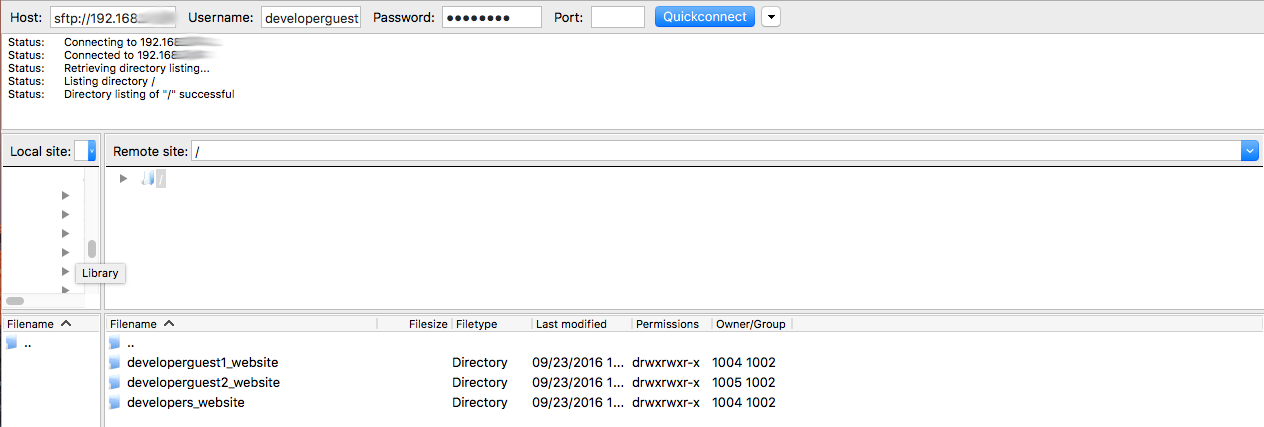
ls /var/developers
developerguest1_website developerguest2_website developers_website
Now we are going to jail the developers users inside /var/www/developers. In order to do this we have to modify our ssh server config, edit /etc/ssh/sshd_config, modify this file as follows:
Port 22
Protocol 2

HostKey /etc/ssh/ssh_host_rsa_key
HostKey /etc/ssh/ssh_host_dsa_key
HostKey /etc/ssh/ssh_host_ecdsa_key
HostKey /etc/ssh/ssh_host_ed25519_key
UsePrivilegeSeparation yes

KeyRegenerationInterval 3600
ServerKeyBits 1024

SyslogFacility AUTH
LogLevel INFO

LoginGraceTime 120
PermitRootLogin without-password
StrictModes yes

RSAAuthentication yes
PubkeyAuthentication yes

IgnoreRhosts yes

RhostsRSAAuthentication no

HostbasedAuthentication no

PermitEmptyPasswords no

ChallengeResponseAuthentication no

PasswordAuthentication yes

X11Forwarding yes
X11DisplayOffset 10
PrintMotd no
PrintLastLog yes
TCPKeepAlive yes

AcceptEnv LANG LC_*

#Subsystem sftp /usr/lib/openssh/sftp-server
Subsystem sftp internal-sftp
UsePAM yes
Match group developers
    ChrootDirectory /var/developers
    ForceCommand internal-sftp
    AllowTCPForwarding no
    X11Forwarding no
Restart the ssh server.
service ssh restart
And change the jailed folder ownership and permissions.
chown root:root /var/developers
chmod go-w /var/developers
In /etc/apache2/apache2.conf we need to add the /var/developers folder for giving apache2 access to this folder.
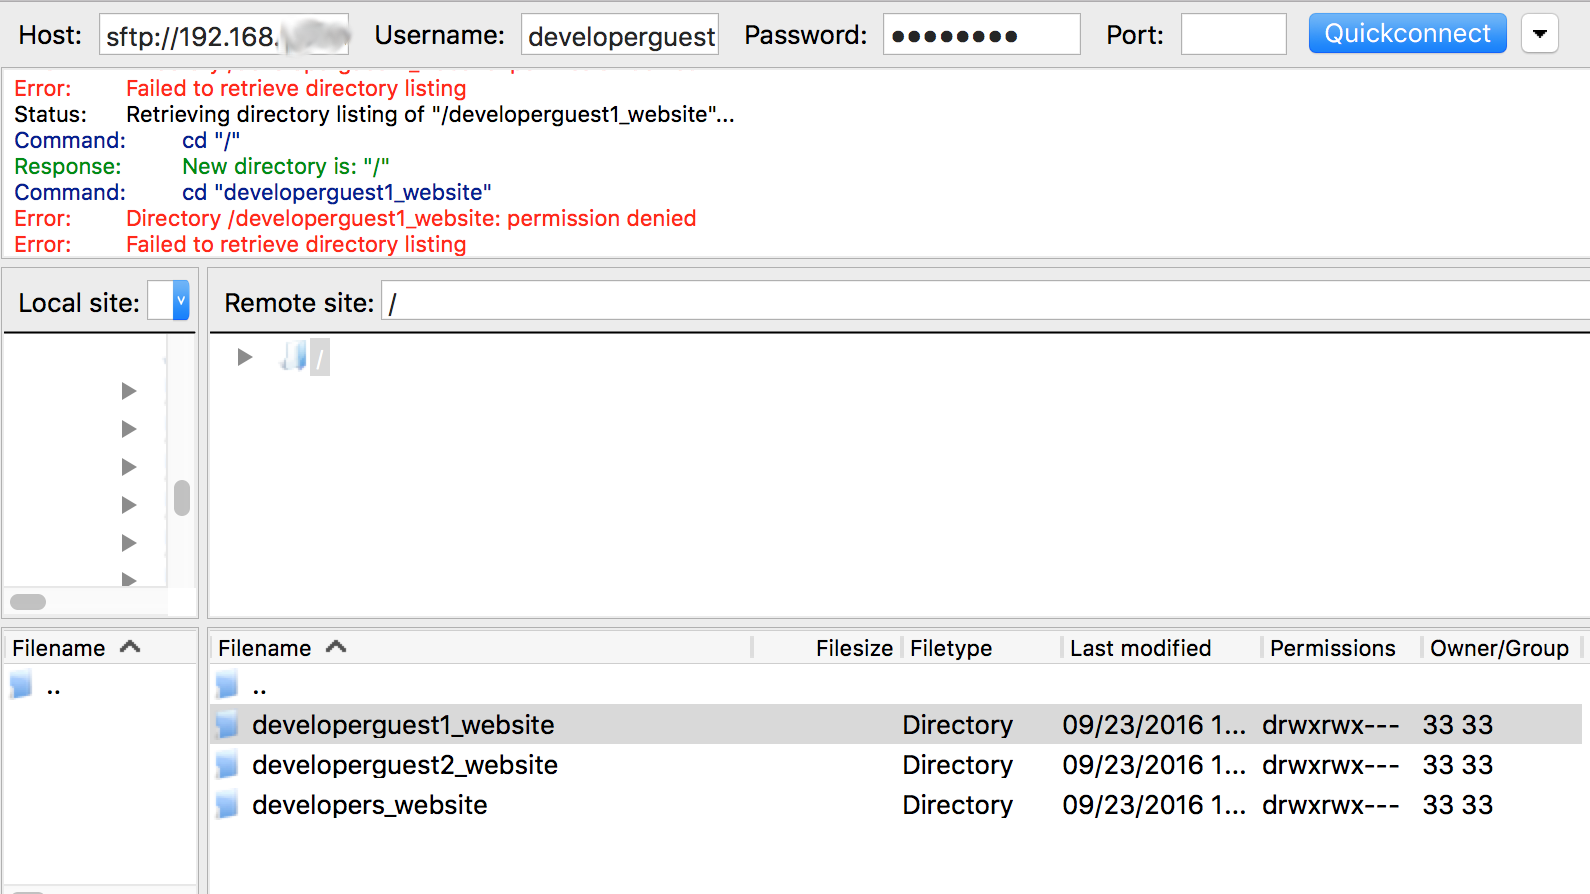
Testing the jail
We did it! developerguest1 and developerguest2 are jailed inside /var/developers and they can’t go outside this folder. The problem is solved.
Going beyond, using ACL
Finally let’s suppose that now we want to block developerguest1 from accessing developerguest2_website folder. Of course we could create a jailed folder for each user to resolve this issue but in this case we are going tu use Linux ACL.
Access Control List (ACL) provides an additional, more flexible permission mechanism for file systems. It is designed to assist with UNIX file permissions. ACL allows you to give permissions for any user or group to any disk resource.
So, what are we going to do?
We will change the ownership of /var/developers sub folders to www-data, the permission will be 770 therefore our developers won’t be able to look into their own folders.
cd /var/developers
chown -R www-data. developerguest1_website  developerguest2_website  developers_website
chmod -R 770 developerguest1_website  developerguest2_website  developers_website
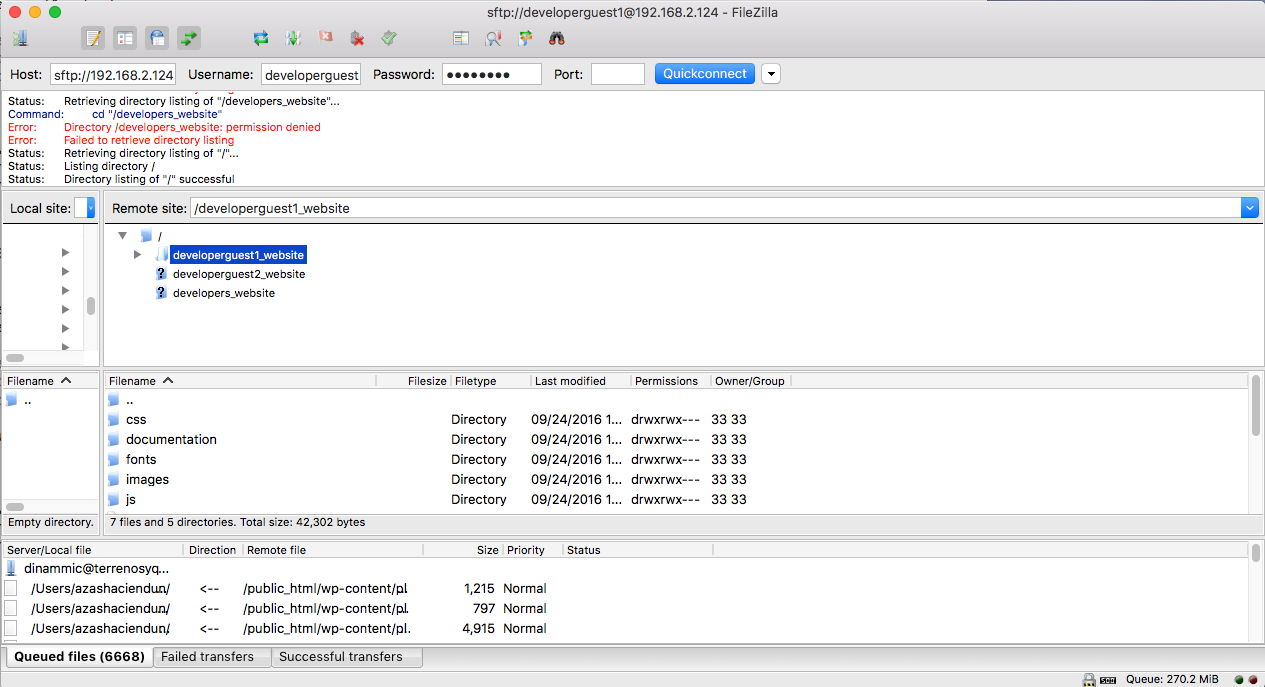
After doing this the developers can’t access to their own directories.
Using ACL we are going to give developerguest1 permissions to work inside developerguest1_website and developers_website folders. We will do the same for developerguest2.
Enabling ACL
By default, ACL is enabled in Ubuntu14 but we need to enable it in our disk partition.
vim /etc/fstab
We need to modify our disk partition settings from this:
LABEL=cloudimg-rootfs / ext4 defaults 0 0
To this:
LABEL=cloudimg-rootfs / ext4 defaults,acl 0 0
We must reboot our vagrant machine.
Let’s review which commands we are going to use: getfacl: to review permissions. setfacl: the acl version of chmod.
Let’s go /var/developers and give developerguest1 rights to /var/developers/developerguest1_website
cd /var/developers
getfacl /var/developers/developerguest1_website

# file: /var/developers/developerguest1_website
# owner: www-data
# group: www-data
user::rwx
group::rwx
other::---
By default, the folder is owned by www-data as we set before. Using ACL’s we are going to configure a new file creation behaviour, for each new file created by our developers, it will have read and execution permission by default. We do this because if devloperguest1 creates a file, www-data won’t be able to read it.
setfacl -R -d -m  g::rwx /var/developers/developerguest1_website
setfacl -R -d -m  o::rx /var/developers/developerguest1_website
getfacl /var/developers/developerguest1_website

# file: /var/developers/developerguest1_website
# owner: www-data
# group: www-data
user::rwx
group::rwx
other::---
default:user::rwx
default:group::rwx
default:other::r-x
Wait, what are these setfacl options? Let’s see them: -R: recurse into subdirectories -d: operations apply to the default ACL -m: modify the current ACL(s) of file(s)
Let’s give developerguest1 permissions in his folder.
setfacl -Rm u:developerguest1:rwx /var/developers/developerguest1_website
getfacl /var/developers/developerguest1_website

# file: /var/developers/developerguest1_website
# owner: www-data
# group: www-data
user::rwx
user:developerguest1:rwx
group::rwx
mask::rwx
other::---
default:user::rwx
default:group::rwx
default:other::r-x
Now developerguest1 is able to access to access to developerguest1_website and modify it.
So, developerguest1 can change and create files that www-data can read, make some tests.
Let’s do the same with developerguest2.
setfacl -R -d -m  g::rwx /var/developers/developerguest2_website
setfacl -R -d -m  o::rx /var/developers/developerguest2_website
setfacl -Rm u:developerguest2:rwx /var/developers/developerguest2_website
getfacl /var/developers/developerguest2_website

# file: /var/developers/developerguest2_website
# owner: www-data
# group: www-data
user::rwx
user:developerguest2:rwx
group::rwx
mask::rwx
other::---
default:user::rwx
default:group::rwx
default:other::r-x
Finally, we can assign access to developers group on developers_website.
setfacl -R -d -m  g::rwx /var/developers/developers_website
setfacl -R -d -m  o::rwx /var/developers/developers_website
setfacl -Rm u:developerguest1:rwx /var/developers/developers_website
setfacl -Rm u:developerguest2:rwx /var/developers/developers_website
getfacl /var/developers/developers_website

# file: /var/developers/developers_website
# owner: www-data
# group: www-data
user::rwx
user:developerguest1:rwx
user:developerguest2:rwx
group::rwx
mask::rwx
other::---
default:user::rwx
default:group::rwx
default:other::rwx
So for any guest developer we create we will need to modify the ACL, isn’t? Well, it is not necessary, we can use ACL’s with groups too.
First, let’s delete the current rules over developers_website. We are going to use -b option to delete all ACL rules. There are many other options that we can use, see setfacl man page.
setfacl -b /var/developers/developers_website
setfacl -R -d -m  g::rwx /var/developers/developers_website
setfacl -R -d -m  o::rwx /var/developers/developers_website
setfacl -Rm g:developers:rwx /var/developers/developers_website
getfacl /var/developers/developers_website

# file: var/developers/developers_website
# owner: www-data
# group: www-data
user::rwx
group::rwx
group:developers:rwx
mask::rwx
other::---
default:user::rwx
default:group::rwx
default:other::rwx
Conclusion
We have learned how to restrict access to some users and manage these access using ACL’s. There are many more things that we can do with ACL’s, this is only a silly example. I hope that you will find this post useful. Stay tuned for new posts.